How to Tile a Shower Like a Pro in Dubai
Learning how to tile a shower can completely transform a bathroom in Dubai, giving it a modern, clean, and high-end look while also increasing property value. A properly tiled shower is not only visually appealing but also durable, water-resistant, and easy to maintain in humid bathroom conditions.
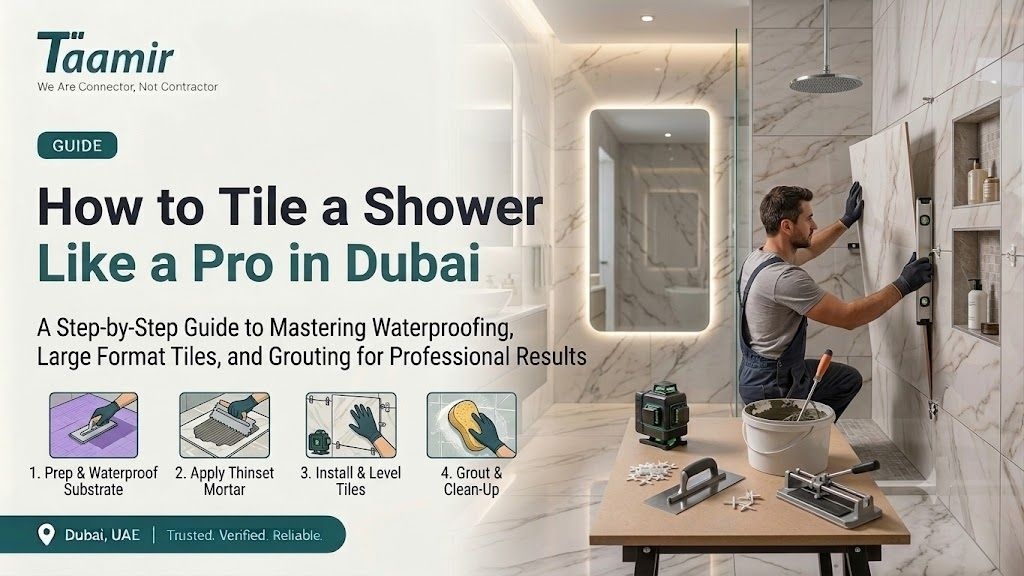
Although shower tiling may seem complex at first, the process becomes much easier when you follow the correct preparation steps and use the right tools. Whether you are renovating an old bathroom or building a new shower space, this guide explains everything you need to achieve professional-quality results.
Why Tile Is the Best Choice for Showers
Tile remains one of the most popular materials for showers in Dubai homes because it offers several important benefits:
• Water resistance
• Long-lasting durability
• Easy cleaning and maintenance
• Wide range of designs and finishes
• Increased property value
• Resistance to humidity and stains
Ceramic and porcelain tiles are especially popular because they perform well in moisture-heavy environments and come in many modern styles.
Tools and Materials You’ll Need
Before starting, gather all necessary tools and materials to ensure a smooth installation process.
Tools
• Tile cutter or wet saw
• Notched trowel
• Tile spacers
• Level tool
• Tape measure
• Grout float
• Sponge
• Buckets
• Utility knife
• Mixing paddle
• Drill
Materials
• Shower tiles
• Thin-set mortar
• Cement backer board
• Waterproof membrane
• Tile grout
• Silicone caulk
• Screws for backer board
• Tile trim pieces
Using high-quality waterproofing materials is essential for preventing leaks and long-term water damage.
How to Tile a Shower Step by Step
Follow each step carefully to achieve a professional finish.
Step 1: Prepare the Shower Walls
Proper preparation is the foundation of any successful shower tiling project.
Remove old tiles, damaged drywall, or any loose material completely. Inspect the wall structure and repair any moisture damage before continuing.
Never install tiles directly on regular drywall in wet areas, as it will quickly deteriorate due to moisture exposure.
Step 2: Install Cement Backer Board
Cement backer board provides a stable, moisture-resistant base for tiles.
Secure the boards to wall studs using screws, leaving small gaps between panels for expansion. Seal all joints using mesh tape and thin-set mortar.
This step helps prevent future cracking and water damage behind the tiles.
Step 3: Apply Waterproofing
Waterproofing is one of the most critical steps in shower installation.
Apply a waterproof membrane or liquid waterproofing product over all surfaces, especially in:
• Corners
• Niches
• Plumbing areas
• Seams
• Shower benches
Skipping waterproofing is one of the most common reasons for leaks and mold problems in bathrooms.
Step 4: Plan the Tile Layout
Before applying mortar, always dry-fit your tiles.
Measure carefully and mark center lines on the wall to ensure balanced placement. This helps avoid uneven cuts in visible areas.
Most professionals start tiling from the second row upward to maintain straight alignment.
Step 5: Mix and Apply Thin-Set Mortar
Prepare thin-set mortar according to the manufacturer’s instructions.
Using a notched trowel, spread mortar over a small section of the wall. Work in manageable areas to prevent it from drying too quickly.
Keep a consistent angle while spreading to create even ridges for better adhesion.
Step 6: Install the Tiles
Press each tile firmly into the mortar while slightly twisting it to improve bonding.
Use tile spacers to maintain consistent grout lines.
Continue checking alignment with a level as you work.
For edges and corners, use a wet saw or tile cutter to achieve precise cuts.
Step 7: Let the Mortar Cure
Allow the mortar to cure completely before grouting.
Most thin-set mortars require at least 24 hours of drying time.
Avoid disturbing the tiles during this period to ensure strong adhesion.
Grouting the Shower Tiles
Grout fills the spaces between tiles and protects against moisture penetration.
Step 1: Apply the Grout
Use a grout float to press grout into the joints at a diagonal angle. Work in small sections for full coverage.
Step 2: Remove Excess Grout
Once grout begins to haze, gently wipe the tiles with a damp sponge.
Rinse the sponge frequently to avoid spreading residue.
Step 3: Polish the Surface
After drying, buff the tiles with a microfiber cloth to remove grout haze.
Step 4: Seal the Grout
Some grout types require sealing to improve water resistance and stain protection.
Sealing helps extend the life of your shower installation.
Common Mistakes to Avoid When Tiling a Shower
Avoid these errors for a long-lasting installation:
• Skipping waterproofing
• Poor tile layout planning
• Using incorrect adhesive
• Rushing drying time
• Ignoring expansion joints
• Uneven tile alignment
Corners should always be sealed with silicone caulk instead of grout to allow natural movement.
Best Types of Tile for Showers
Choosing the right tile affects both durability and design.
Porcelain Tile: Highly water-resistant, durable, and low maintenance.
Ceramic Tile: Affordable and available in many colors and styles.
Natural Stone: Luxurious appearance but requires more maintenance and sealing.
Mosaic Tile: Ideal for shower floors due to improved slip resistance.
How Long Does It Take to Tile a Shower?
Time depends on shower size and experience level.
Typical timeline:
• 1–2 days for preparation
• 1–2 days for tile installation
• 1 day for grouting and finishing
More complex designs may take longer.
Tips for Professional Results
• Use leveling spacers for large tiles
• Check alignment frequently
• Cut tiles carefully around fixtures
• Work slowly and precisely
• Maintain consistent grout lines
• Clean excess mortar immediately
Patience is essential for achieving a clean, professional finish.
Final Thoughts
Understanding how to tile a shower properly is essential for creating a durable, stylish, and modern bathroom upgrade in Dubai. With the right preparation, precise workmanship, and attention to detail, you can achieve a high-quality finish that enhances both the look and functionality of your bathroom.
In many modern renovation projects, including bathroom wrapping as part of the overall design approach can further improve the visual consistency and waterproof performance of the space. By using high-quality materials, ensuring proper waterproofing, and carefully following each installation step, you can build a shower area that stays beautiful, functional, and long-lasting for years to come.