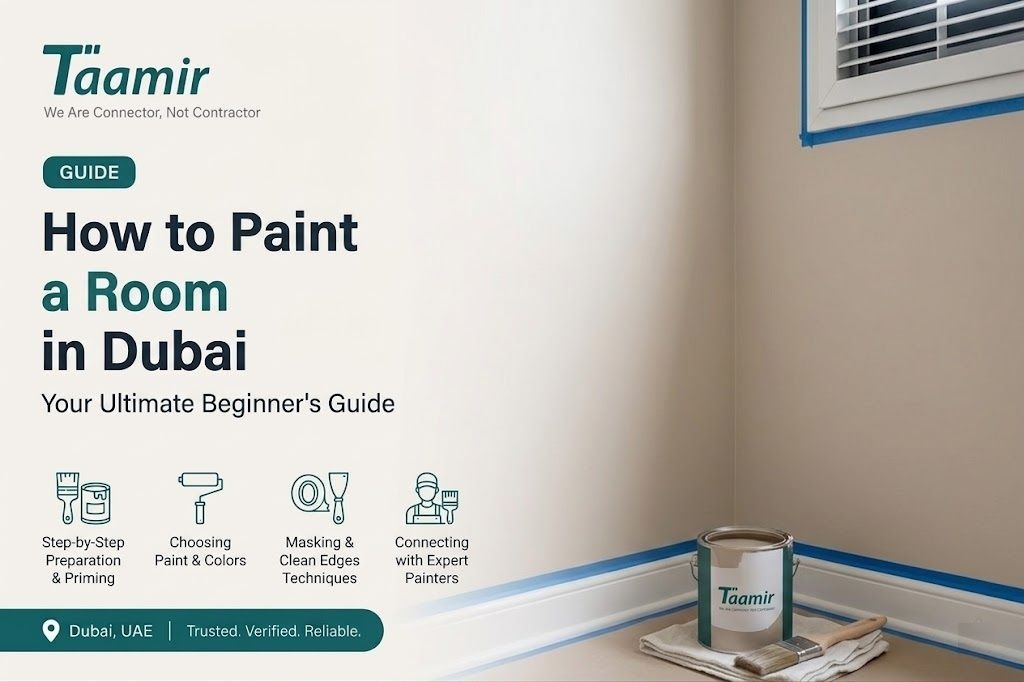
How to Paint a Room in Dubai: Your Ultimate Beginner's Guide
A fresh coat of paint can completely transform a home in Dubai, giving outdated interiors a modern, bright, and welcoming appearance without the expense of a full renovation. Whether you live in a villa, apartment, or townhouse, painting is one of the most cost-effective ways to refresh your space.
The best part is that you don't need professional experience to achieve impressive results. With the right preparation, tools, and techniques, even first-time DIY painters can successfully complete a room from start to finish.
Whether you're updating a bedroom, refreshing your living room, or covering old wall colors, this complete guide will show you exactly how to paint a room properly in Dubai's unique climate.
A DIY Guide to Painting a Room From Start to Finish
Before opening a paint can, remember that the secret to a professional-looking finish is preparation. Most painting problems happen before the first brush stroke is even applied. Investing time in preparation will help you achieve cleaner, smoother, and longer-lasting results.
Step 1: Choose the Right Paint Color
One of the biggest challenges when learning how to paint a room in dubai is selecting the right color.
In Dubai, natural sunlight can be very intense, which means paint colors often appear different throughout the day. A shade that looks perfect in a showroom may appear brighter, warmer, or darker once applied to your walls.
A smart approach is to test paint samples directly on your walls before purchasing large quantities. Apply small sample patches and observe them under both natural daylight and indoor lighting.
If you're unsure, neutral colors remain a popular choice in Dubai homes. Soft whites, warm greiges, beige tones, sand-inspired shades, and muted earth colors complement a wide variety of interior styles.
Tips for Choosing Colors
• Light colors make smaller rooms feel larger and brighter
• Dark colors add depth and sophistication
• Cool colors create a calm atmosphere
• Warm tones make spaces feel comfortable and inviting
• Test paint samples before making a final decision
Testing colors beforehand can save both time and money.
Step 2: Understand Paint Finishes
Choosing the correct paint finish is just as important as selecting the color. The finish affects durability, appearance, and ease of cleaning.
Common Paint Finishes
Flat or Matte Finish
• Minimal shine
• Helps hide wall imperfections
• Ideal for ceilings and low-traffic areas
Eggshell Finish
• Soft, subtle sheen
• More durable than matte paint
• Suitable for bedrooms and living rooms
Satin Finish
• Moisture-resistant and easy to clean
• Popular in kitchens, bathrooms, and hallways
• One of the best choices for beginners
Semi-Gloss Finish
• Durable and reflective
• Commonly used on doors, trim, and cabinets
For most residential painting projects in Dubai, satin and eggshell finishes offer an excellent balance between appearance and durability.
Step 3: Gather Your Painting Supplies
Using quality tools can make the job easier and improve the final outcome.
Before starting, gather the following supplies:
• Paint rollers and roller frame
• Extension pole
• Angled paint brush
• Paint tray and liners
• Painter's tape
• Drop cloths
• Sandpaper
• Wall filler or spackle
• Stir sticks
• Microfiber cloths
• Ladder or step stool
High-quality brushes and rollers typically produce smoother finishes and fewer imperfections.
Step 4: Prepare the Room
Proper preparation is one of the most important steps in any painting project.
Remove wall decorations, outlet covers, nails, and as much furniture as possible. Move remaining furniture to the center of the room and cover it with protective sheets.
Inspect the walls carefully for imperfections.
Fill cracks, nail holes, and dents with filler and allow it to dry completely. Once dry, sand the repaired areas until smooth.
Finally, wipe down the walls to remove dust and dirt. Clean surfaces help paint adhere more effectively.
Why Wall Preparation Matters
Skipping preparation is one of the most common painting mistakes. Proper prep work improves paint adhesion, increases durability, and creates a smoother finish.
Step 5: Tape Edges Carefully
Painter's tape helps create clean lines around:
• Baseboards
• Windows
• Door frames
• Trim
• Ceilings
Apply the tape carefully and press down the edges firmly to prevent paint from seeping underneath.
Although this step requires extra time, it significantly improves the final appearance.
Step 6: Cut In Around the Edges
Before using a roller, you'll need to paint areas that are difficult to reach.
Using a two-inch angled brush, paint around:
• Ceilings
• Corners
• Windows
• Baseboards
• Trim
Paint approximately two to three inches from the edge so the roller can blend the paint smoothly.
Avoid overloading the brush with paint. Controlled strokes generally produce cleaner results.
Step 7: Roll the Walls Properly
This is the stage most people think of when they imagine painting a room.
Pour paint into the tray and evenly load the roller. Remove excess paint to avoid drips and uneven textures.
Work in sections approximately two to three feet wide using a "W" or "M" pattern. This technique helps distribute paint evenly and minimizes roller marks.
Best Rolling Tips
• Maintain a wet edge while painting
• Roll from top to bottom
• Avoid pressing too hard on the roller
• Slightly overlap each section for consistent coverage
Taking your time during this step will create a smoother finish.
Step 8: Apply a Second Coat
Most interior walls require two coats of paint for the best appearance.
Even if the first coat looks acceptable, the second coat improves:
• Color consistency
• Durability
• Overall finish quality
Allow the first coat to dry completely before applying the second layer.
Patience during this stage often makes a noticeable difference.
Step 9: Remove Painter's Tape Carefully
One common mistake is leaving painter's tape on for too long.
Remove the tape while the paint is still slightly tacky. Pull it away slowly at a 45-degree angle to avoid damaging the paint.
This simple technique helps create crisp, professional-looking lines.
Step 10: Clean Your Painting Tools
After completing the project, clean all brushes and rollers immediately.
Wash water-based paint tools with warm soapy water and allow them to dry completely before storage.
Proper maintenance can help quality brushes and rollers last for multiple projects.
It's also a good idea to save leftover paint for future touch-ups.
Common Beginner Painting Mistakes to Avoid
Even simple painting projects can produce poor results if basic techniques are ignored.
Avoid these common mistakes:
• Skipping wall preparation
• Using low-quality brushes or rollers
• Applying paint too heavily
• Ignoring recommended drying times
• Choosing the wrong paint finish
• Painting in poor lighting conditions
• Failing to test paint samples beforehand
Avoiding these issues can significantly improve the final outcome.
Frequently Asked Questions
How long does it take to paint a room?
Most standard rooms require one to two days, including preparation, painting, and drying time.
Do I need primer before painting?
Primer is recommended when painting over dark colors, fresh drywall, stains, or glossy surfaces.
What is the best paint finish for beginners?
Eggshell and satin finishes are often the most beginner-friendly because they are durable and easy to maintain.
How many coats of paint should I apply?
Most interior walls require two coats for smooth, consistent coverage and long-lasting results.
Final Thoughts
Learning how to paint a room is one of the easiest and most rewarding DIY home improvement projects. Whether you're refreshing a villa in Dubai or updating an apartment, a well-executed paint job can dramatically improve the look and feel of your space.
The key is to focus on preparation, use quality materials, and allow sufficient drying time between coats. By following these steps carefully, you can achieve professional-looking results and enjoy a beautifully refreshed room for years to come.