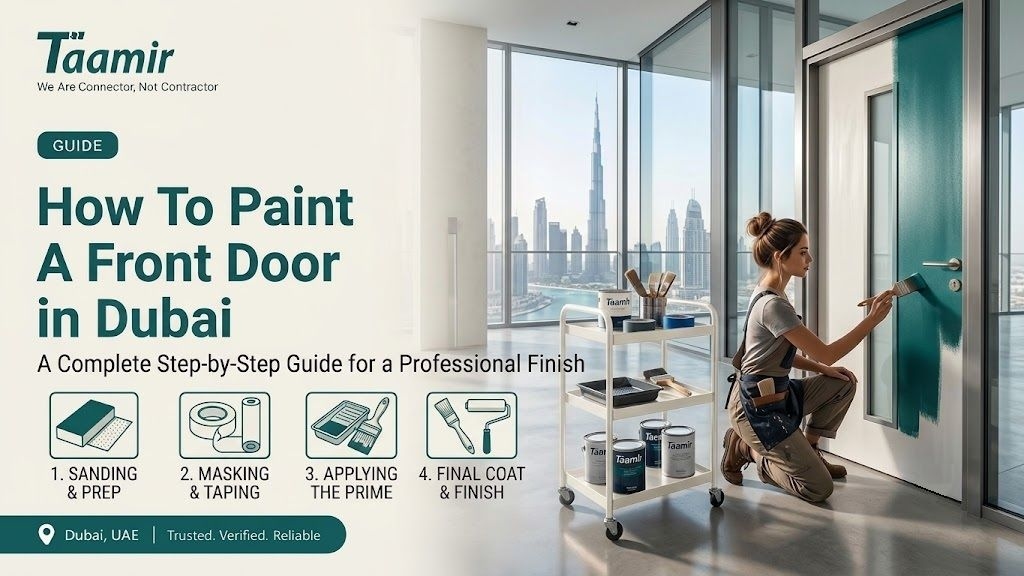
How To Paint A Front Door in Dubai: A Complete Step-by-Step Guide for a Professional Finish
Your front door is one of the first features visitors notice when approaching your home. A freshly painted front door can instantly enhance curb appeal, create a more welcoming entrance, and significantly improve the overall look of your property.
In Dubai, front doors are constantly exposed to harsh environmental conditions, including strong UV rays, dust buildup, humidity, and fluctuating temperatures. Over time, these factors can cause paint to fade, crack, peel, or lose its original vibrancy. While many homeowners consider this a DIY project, achieving a truly durable and professional finish often requires the right materials and expert application techniques.
For those who prefer a flawless, long-lasting result without the hassle, professional services such as Taamir Painting Services offer specialized painting solutions that ensure smooth finishes, proper surface preparation, and high-quality coatings designed for Dubai’s climate.
With the right approach, whether DIY or professional, you can achieve a clean, durable, and visually appealing front door finish that improves both the protection and beauty of your home entrance. In this guide, we’ll walk you through everything you need to know about painting a front door in Dubai, from selecting the right paint to applying the final coat for long-lasting results.
Why Painting Your Front Door Is Important for Homes in Dubai
A front door does much more than provide access to your home. It contributes significantly to your property's first impression and acts as a protective barrier against the elements.
Over time, Dubai's harsh climate can take a toll on exterior surfaces. Continuous exposure to sunlight, airborne dust, humidity, and daily use may leave your door looking worn and outdated.
Painting your front door offers several benefits:
Refreshes your home's exterior appearance
Protects the surface from weather-related damage
Covers scratches, dents, and minor imperfections
Increases curb appeal and property value
Updates the style of your entrance without major renovations
Extends the lifespan of the door material
A fresh coat of paint remains one of the most cost-effective ways to upgrade the appearance of your home.
Choosing the Best Exterior Paint for Front Doors in Dubai
Selecting the right paint is one of the most important steps in ensuring a durable and attractive finish.
Because front doors are exposed to outdoor conditions year-round, it's essential to use paint specifically designed for exterior applications.
Recommended Types of Front Door Paint
The best options include:
Exterior acrylic paint
Exterior latex paint
Weather-resistant enamel paint
These products are designed to withstand UV exposure, humidity, and temperature changes while maintaining their color and finish for longer periods.
Best Paint Finish for a Front Door
When choosing a finish, most homeowners prefer:
Satin
Semi-gloss
Gloss
Semi-gloss and gloss finishes are particularly popular because they:
Resist moisture and dirt
Are easier to clean
Highlight architectural details
Offer superior durability
Reflect light beautifully
A quality finish not only enhances appearance but also helps protect the door from everyday wear and tear.
Essential Tools and Materials Needed to Paint a Front Door
Before beginning your project, gather all necessary tools and materials to ensure a smooth workflow.
Tools You'll Need
Paintbrush
Small foam roller
Painter's tape
Sandpaper
Screwdriver
Drop cloth
Cleaning sponge
Paint tray
Putty knife
Materials Required
Exterior primer
Exterior paint
Wood filler (if necessary)
Mild cleaning solution
Clean cloths
Preparing everything in advance helps prevent interruptions and allows you to focus on achieving the best possible finish.
Step-by-Step Guide: How to Paint a Front Door Like a Professional
Proper preparation and careful application are the keys to a successful paint job.
Step 1: Remove or Protect Door Hardware Before Painting
Before opening the paint can, inspect all hardware attached to the door.
This may include:
Handles
Locks
Door knockers
Mail slots
House numbers
Decorative accessories
Whenever possible, remove these items completely. Painting around hardware often results in uneven edges and a less professional appearance.
If removal isn't practical, carefully cover each component using painter's tape to protect it from accidental paint splashes.
Taking a few extra minutes during this stage can significantly improve the final result.
Step 2: Clean the Front Door Surface Thoroughly
A clean surface is essential for proper paint adhesion.
Dust, grease, fingerprints, and dirt can prevent primer and paint from bonding effectively, leading to premature peeling or uneven coverage.
Using warm water and a mild detergent, thoroughly clean the entire door surface.
Pay particular attention to:
Door handles and surrounding areas
Lower sections exposed to dust
Corners and decorative grooves
Areas with visible stains
After cleaning, allow the door to dry completely before moving to the next step.
Step 3: Repair Cracks, Holes, and Surface Imperfections
Inspect the door carefully for signs of damage.
Look for:
Small cracks
Nail holes
Dents
Chipped paint
Minor surface damage
Fill imperfections using a suitable wood filler and allow it to dry according to the manufacturer's instructions.
Once dry, sand the repaired areas until they blend seamlessly with the surrounding surface.
This stage is crucial because paint tends to highlight imperfections rather than hide them.
Step 4: Sand the Door for Better Paint Adhesion
Sanding creates a smooth, even surface and improves the ability of primer and paint to adhere properly.
Focus on:
Glossy finishes
Rough areas
Peeling paint
Previous brush marks
Repaired sections
You don't need to remove all existing paint unless it's heavily damaged. Light sanding is usually sufficient to create a suitable surface.
After sanding, wipe away all dust using a damp cloth or tack cloth.
A dust-free surface helps ensure a smoother and more durable finish.
Step 5: Apply Exterior Primer for Long-Lasting Results
Primer creates a strong foundation for the paint and significantly improves durability.
Applying primer is especially important when:
Painting bare wood
Switching from dark to light colors
Covering stains
Repainting damaged surfaces
Painting over repaired areas
A quality primer improves paint adhesion, enhances color consistency, and often reduces the number of paint coats required.
Allow the primer to dry fully before proceeding.
Step 6: Apply Paint Using Proper Front Door Painting Techniques
Once the primer has completely dried, you can begin painting.
For paneled doors, follow this sequence:
Paint recessed panels first.
Paint vertical sections and stiles.
Paint horizontal rails.
Finish with outer edges and borders.
Use a paintbrush for detailed areas and corners, while using a small roller on flat sections to achieve a smoother finish.
Apply Multiple Thin Coats Instead of One Thick Coat
One of the most common painting mistakes is applying too much paint at once.
Thin coats provide several advantages:
Smoother appearance
Fewer brush marks
Faster drying
Better durability
Reduced risk of drips
Most front doors require two coats for full coverage, while some colors may need a third coat for optimal results.
Step 7: Allow Sufficient Drying and Curing Time
Proper drying is essential for a professional-quality finish.
After applying the final coat:
Avoid closing the door too soon
Minimize touching the painted surface
Wait before reinstalling hardware
Protect the door from dust whenever possible
Although paint may feel dry within a few hours, complete curing often takes several days.
Allowing adequate curing time helps prevent fingerprints, scratches, and premature wear.
Common Front Door Painting Mistakes to Avoid
Avoiding these common errors can significantly improve your final results.
· Skipping Surface Preparation: Paint adheres best to clean, properly prepared surfaces.
· Painting During Extreme Weather: In Dubai, direct sunlight, excessive heat, humidity, and dust storms can negatively affect paint application and drying.
· Applying Thick Paint Layers: Heavy coats often lead to drips, uneven texture, and longer drying times.
· Neglecting Primer: Primer improves adhesion, coverage, and overall durability.
· Rushing Between Coats: Allowing sufficient drying time between coats helps create a smoother and more professional finish.
Best Front Door Colors for Modern Dubai Homes
Choosing the right color can transform the appearance of your home's exterior.
Popular front door colors include:
Black
White
Navy blue
Charcoal gray
Deep green
Rich red
Soft beige
Dark brown
When selecting a color, consider your home's architectural style, exterior color scheme, and personal preferences.
A well-chosen front door color can become a striking focal point that enhances curb appeal.
How Long Does It Take to Paint a Front Door?
The overall timeline depends on the condition of the door, weather conditions, drying times, and the number of coats required.
Typical Project Timeline
Cleaning and preparation: 1–2 hours
Repairs and sanding: 1–2 hours
Priming: Approximately 1 hour plus drying time
Painting: 1–2 hours
Final drying and curing: Several hours to overnight
In most cases, homeowners can complete the project within a day, although full paint curing may take several additional days.
Expert Tips for Achieving a Professional Front Door Finish
For the best possible outcome:
Use premium exterior paint products
Choose weather-resistant finishes
Paint during cooler parts of the day
Apply thin, even coats
Sand lightly between coats when needed
Use brushes and rollers appropriately
Follow recommended drying times
Keep the work area clean and dust-free
Attention to detail throughout the process often separates an average paint job from a truly professional-looking finish.
Final Thoughts
Learning how to paint a front door is one of the easiest and most affordable ways to refresh your home's exterior. With proper preparation, high-quality materials, and careful application, you can achieve a beautiful finish that improves curb appeal while protecting your door from Dubai's challenging climate.
Whether you live in a villa, townhouse, or apartment, a freshly painted front door can instantly elevate the appearance of your property, create a welcoming first impression, and add long-lasting value to your home.