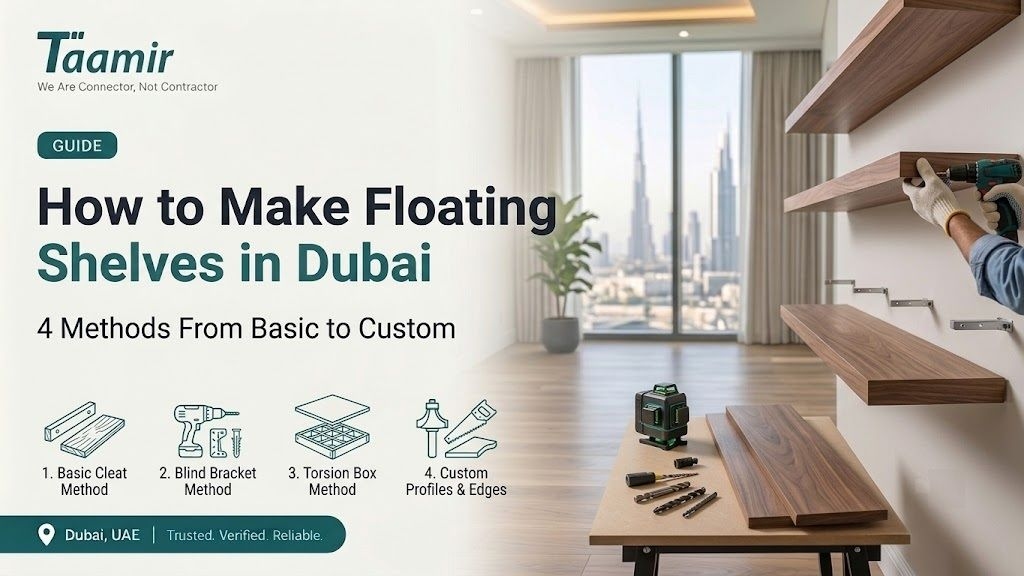
How to Make Floating Shelves | 4 Methods From Basic to Custom
Floating shelves are one of the most popular DIY home improvement projects in Dubai because they combine modern design, practical storage, and space-saving functionality. Whether you live in a compact apartment or a spacious villa, floating shelves can instantly upgrade your interior without requiring a large renovation budget.
From displaying décor in the living room to organizing kitchen essentials or creating stylish bedroom storage, learning how to make floating shelves can completely transform your space.
The best part is their clean, minimal, and modern appearance, which fits perfectly with contemporary Dubai interiors.
In this guide, you’ll learn how to make floating shelves using four different methods, ranging from beginner-friendly options to advanced custom-built designs.
How to Make Floating Shelves: What to Consider First
Before choosing a method, think about:
• Your budget
• The weight the shelves need to support
• Your DIY or woodworking experience level
• The style and finish you want for your home
Some floating shelves can be completed in a few hours, while others require more advanced woodworking skills and tools.
Method 1: Simple Floating Shelves With Hidden Brackets
This is the easiest and most beginner-friendly method for making floating shelves.
What You’ll Need
• Wooden board
• Hidden floating shelf brackets
• Drill
• Screws and wall anchors
• Sandpaper
• Paint or wood stain
• Level tool
Step 1: Choose Your Wood
Select a solid wood board or thick plywood for better durability.
Common choices include:
• Pine
• Oak
• Maple
• Birch plywood
Thicker boards provide a more modern look and stronger support.
Step 2: Sand the Wood
Smooth all surfaces and edges using sandpaper.
Proper sanding ensures:
• A smoother finish
• Better paint or stain absorption
• A more professional appearance
Step 3: Install Hidden Brackets
Hidden brackets are metal supports installed inside the shelf, making them invisible after installation.
For stronger support in Dubai homes, always try to mount brackets into wall studs whenever possible.
Step 4: Attach the Shelf
Slide the wooden board onto the brackets and secure it if needed.
Use a level to ensure the shelf is perfectly straight.
Why This Method Works Well
• Easy for beginners
• Budget-friendly
• Quick installation
• Ideal for lightweight décor
However, it is not the best option for heavy storage.
Method 2: Build a Hollow Floating Shelf
This method creates a thicker, more premium-looking floating shelf that resembles custom cabinetry.
Materials Needed
• Plywood or hardwood boards
• Wood glue
• Screws or brad nails
• Drill
• Clamps
• Internal wall frame
Step 1: Build the Internal Frame
Create a wooden support frame that attaches directly to the wall.
This hidden structure carries the weight of the shelf.
Step 2: Build the Shelf Box
Construct a hollow box using:
• Top panel
• Bottom panel
• Front panel
• Side panels
Join all parts using wood glue and nails or screws.
Step 3: Sand and Finish
Sand the entire structure for a smooth finish.
You can:
• Stain the wood for a natural look
• Paint it for a modern interior style
Step 4: Mount the Frame
Secure the internal frame into wall studs using strong screws.
Step 5: Install the Shelf
Slide the hollow shelf over the frame for a seamless floating effect.
Benefits of Hollow Shelves
• Stronger weight support
• Premium custom appearance
• Suitable for heavier items
• More durable than basic shelves
Method 3: Rustic Reclaimed Wood Floating Shelves
This method is ideal for homes in Dubai that use warm, natural, or farmhouse-style interior design.
Reclaimed wood adds:
• Character
• Texture
• Warmth
• Unique natural patterns
Best Wood Types
• Reclaimed pine
• Barn wood
• Cedar
• Weathered oak
Step 1: Clean the Wood
Reclaimed wood may contain dust, old nails, or rough surfaces.
Clean thoroughly and sand lightly while preserving its natural texture.
Step 2: Seal the Wood
Apply a wood sealer or protective coating to increase durability and protect against humidity.
Step 3: Install Strong Brackets
Since reclaimed wood is often heavier, use heavy-duty hidden brackets for safe installation.
Step 4: Style the Shelves
Decorate with:
• Indoor plants
• Books
• Kitchen items
• Decorative objects
• Photo frames
Rustic shelves work especially well in kitchens, living rooms, and bathrooms.
Method 4: Custom Built-In Floating Shelves
This is the most advanced method and produces a fully integrated, high-end architectural look.
These shelves are commonly used in:
• Living room feature walls
• Home offices
• Fireplace areas
• Entertainment units
Why Choose Custom Shelves?
• Perfect wall integration
• Maximum storage efficiency
• Premium interior design look
• Can increase property value
Step 1: Take Accurate Measurements
Measure carefully:
• Wall width
• Shelf depth
• Shelf spacing
• Stud positions
Precision is critical for a professional finish.
Step 2: Build the Support Structure
Install a strong internal frame securely attached to wall studs.
This structure ensures long-term stability.
Step 3: Install Shelf Boxes
Build shelf units and attach them over the support frame.
Step 4: Finish the Design
Choose a finish based on your interior style:
• Painted white for modern interiors
• Wood stain for warm, natural aesthetics
Common Mistakes to Avoid
• Not securing shelves into wall studs
• Using weak anchors for heavy shelves
• Choosing thin wood for large loads
• Skipping sanding
• Incorrect measurements
• Uneven installation
• Overloading shelves
Taking your time during installation is essential for safety and durability.
Tips for Professional-Looking Floating Shelves
• Use thicker wood boards
• Hide screws and brackets carefully
• Sand edges thoroughly
• Use a level at every step
• Match colors and finishes consistently
• Always secure heavy shelves into studs
Small details can make a big difference in the final appearance.
Frequently Asked Questions
What is the easiest way to make floating shelves?
Using pre-made hidden brackets with solid wood boards is the simplest method for beginners.
How much weight can floating shelves hold?
It depends on wall type, bracket strength, and wood thickness. Shelves mounted into studs can hold significantly more weight.
What is the best wood for floating shelves?
Pine is affordable and beginner-friendly, while oak and maple are stronger and more durable.
Do floating shelves need wall studs?
For heavy shelves, mounting into studs is strongly recommended for safety and stability.
Final Thoughts
Learning how to make floating shelves is one of the most rewarding DIY projects for improving both storage and interior design in dubai.
Whether you choose a simple beginner method or a fully custom built-in system, floating shelves can instantly enhance the look and functionality of your Dubai home.
With proper planning, accurate measurements, and secure installation, you can create beautiful floating shelves that look professional and last for years.